|
Todds '67 912 Restoration - May 19 Update
More Updates from Todd Miller (in his own words):
|
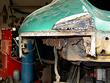
Well it took several hours but I finished the
fabrication on the dreaded Tail Light Assembly. areas. It took longer than I
figured it would. I have a couple picture of before I re-worked them, I'll
get you the finished pictures this week. I have completed the welded and now
I'm going to concentrate on metal prepping and sealing. More on that process
coming.
|
|
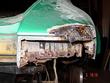
Now you should have the left or driver rear area and here is the right
side. It's bad too, but not as bad as the mess I fixed on the left side.
|
|
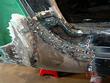
Some of the most interesting area to restore was the section that mates the
rocker to the door jam. This took a long time because as you look close you
will see several different pieces that had to be cut to fit. When you are
welding in such an area it gets easy to blow holes. Even my neighbor was
impressed with this one. I guess the practice paid off through this part.
|
|
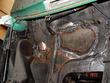
Moving forward, here is a shot of the front passenger Wheel well area just
behind the stand tube that houses the wiring harness.
|
|
This shot is moving around the front of the car. Here is the inside forward
compartment that I found needed some work. I found that the previous owner
had put some tin over a hole under the dash and when I took it off I had a
pretty good size hole to plug.
|
|
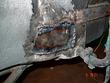
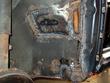
I had to rebuild the battery box area, there was a massive hole from the
years of improper ventilation This took a lot of custom fitting that took
time cutting and bending into position.
|
|
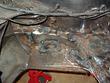
This is a shot that follows the gas tank support area running back to the
electrical fuse box area. I used heavy duty 16 gauge through this area. It
was harder to form but I wanted the extra strength.
|
|
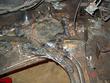
OK, This is a shot of the driver's side with the front fender support and
the patch work down on the corner that mates into the new rocker area.
|
|
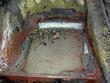
OK, you remember the big holes in the back seat areas, well tell me what you
think now? This is a shot of the driver's rear seat. Another very hard area
to work with. the metal was thin through here too, and that required a
steady hand with the right flow and heat to not blow a bigger hole.
|
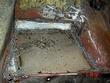
| It's getting late out here Sunday night, and Deana is telling me I
better get to bed. So here is the back seat passenger side. Again the
forming and thin metal were difficult to work with. Good night and I
hope you have seen some progress.
|
Last modified: Sun, 19 May 2002
Links
|


