Restore and Repaint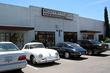 The restoration done at
Bodystyle on Brocaw in San Jose is now done thanks to the attention of
the owners Cecil and Carrol Beach and the foreman, Mick. They repaired
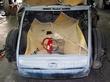
the rust damage in the rocker panel, door jam and the rain drip lip on
the cowl that keeps water out of the trunk and fixed an old repair
that had been done with pop rivets on the nose. The restoration done at
Bodystyle on Brocaw in San Jose is now done thanks to the attention of
the owners Cecil and Carrol Beach and the foreman, Mick. They repaired
the rust damage in the rocker panel, door jam and the rain drip lip on
the cowl that keeps water out of the trunk and fixed an old repair
that had been done with pop rivets on the nose.
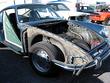
This is one of the last of the local shops that does really high quality body and paint work that also really knows Porsche. They know how these cars were originally manufactured and they repair them the same way. In calling around, I got their name from several sources including Del Sessions, who did my front body pan. It is a rather large shop that has half dozen Porsches in various stages of completion from a full restoration '58 356 (est $25K in work for the original owner) to insurance covered collision damage on some of the latest models. I was able to take progress pictures so I can post them here. The cost was much more than from people I don't trust. But this shop talks the talk - the others don't come close. The repair were done to the highest standards. A complete inspection was done. All rust damage from the passenger compartment forward has been repaired. Any damage found was removed, either by cutting out the metal or sand blasting small areas. MIG welding was used to add metal to small perforation areas and then ground flat again. There was no plastic filler. There may have been a bit of lead used in the area of the passenger door just like the original factory. Spot welds were used where the factory spot welded. My budget was not enough to include repainting the hood, front fenders or passenger door. That will have to wait for another time. My car was being eaten alive by rust in a couple of places. That is no longer true at least from the doors forward. 2 years after purchase the area under the passenger door striker plate showed problems as well as the door sill over the jack point as it crawls toward the front of the car. Similarly the cowl rain drain area had perforations and I only noticed that one last winter. A cancer that grows. I truly hate the rust. An insidious car killer, hard to contain, really difficult to repair properly. Get it wrong and it returns because unprotected inner weld areas are particularly prone to starting again if not treated properly. I often toy with the idea of learning how to do this kind of work - particularly the prep and painting, but in the end I don't want a project, I want a driver. In addition, I really don't know how to do this work to Porsche standards. Repairs like these need to last another 20-30 years, not be hidden enough to call the car 'rust free' and not presented to an unsuspecting audience. We will see in this story how difficult it is to discover whether a car is rust free. For example, you certainly do not know until the fenders have been removed. There are so many pictures that I've divided the project in to sections: The Damaged AreasThe scary part of the repair efforts is that one really does not know how much damage is hidden behind the visible areas and will not know until the areas are opened up. Here are pictures of some paint damage that was not repaired because of budget constraints:
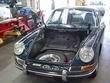
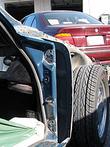
At the ShopWe dropped the car off at the shop on Monday morning. I happened to be there when the project started. The first step was an inventory of working systems including lights. We joked about my backup lights not working as I claimed they were (not). The goal on working on the front of the car is to solve all rust problems from the windsheild forward. This requires pulling the fenders.
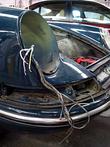
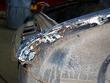
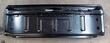
Nose Pannel
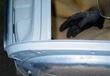
Fender Hood SealThere is the start of rust under the hood seal along the fenders.
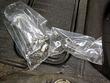
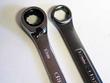
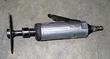
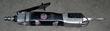
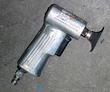
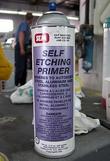
Tools and Materials
Links
Site Details.
Disclaimer.
Comments? Questions?
Dave Hillman
Content attribted to others remains their property. Otherwise the text and images are licensed under a Creative Commons License. 

|