|
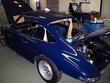
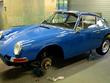
Perry Rijnbeek 912 Restoration
Hello,
My name is Perry Rijnbeek. I live in Holland (the Netherlands) in a
place called Nieuw Vennep. At the moment I am being very busy with the
restoration of my girlfriends 1966 or 1967 912. (I am not sure of the
year, I think it has been build in 1966 but the registration tells
1967 but I think this is not correct, VIN number 353223, please
advise). We own the car now about 3 years. We bought the car while it
was still driving in the U.S. from its previous owner. He had imported
the car from Germany himself so it is now a little bit closer to its
home ground. My girlfriend used the car as a daily driver for about
1,5 years. After some big trips and some historic rallying the engine
of the 912 was ticking a bit so we decided to stop driving it until
the engine is fixed. This was 1,5 year ago, since I was also
restoring my own Alfa Romeo Giulia.
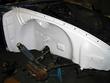
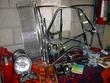
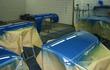
So about 3 months ago we started on the Porsche. We took out the
engine and brought it to Germany for restoration. In the meanwhile we
completely stripped the car to its bare metal. This is when we found
out that also a Porsche can have some rust problems. So me and a
friend of my who works at a body shop started fixing up the body of
the car. The bottom of the car was also stripped of all its protective
coating and this has been redone already. Also the rear suspension is
completely revised. This Saturday we will be spraying the car for the
second time. In total the car will have 6 layers of paint with the
last one being a transparent coating. The car was painted in the
U.S. in Bali Blue, witch is not its original color. This should be
6603 Gulf Blue. So the original paint color will be applied again.
I saw a lot of helpful tips on your web site and wanted to tell you to
keep up the good work. I will also send you some pictures of the
restoration in several e-mails because of the size. You may place them
on the site.
I will keep in touch on the project, it should be ready in about two
months. We are planning to take the car on our honeymoon trip in
August to Italy.
Thank you for your great site,
Kind regards,
Perry Rijnbeek
|
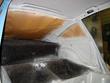
Beginning to tear down the car. The engine not yet
removed.
|
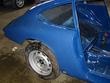
|
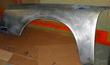
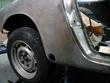
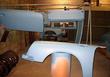
Fenders pulled. Stripping off the undercoat. The
car seems in very good condition.
|
|
Inner fender well has been taken to bare metal and
primer sprayed on.
|
|
Undercoat on top of the primer.
|
|
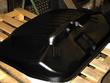
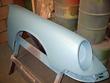
Fender stripped.
|
|
Fender with first coat.
|
|
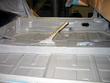
Body pan with primer.
|

|
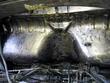
Front trunk primed
|
|
and undercoated.
|
|
Fuel tank.
|
|
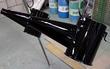
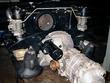
Engine pulled and off to the rebuilder
|
|
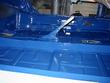
Engine compartment and seat wells stripped.
|

|
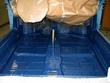
Primer on the seat wells.
|
|
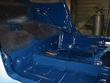
Inner rear fender area.
|
|
Repairing damage to rocker panels.
|
|
Metal replacement finished.
|
|
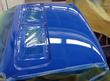
Primer on door, rear deck lid and the hood.
|
|
Bright work all cleaned up.
|
|
Air cleaners
|

|
Engine sheet metal
|
Update Mar 20, 2003
Hi Dave,
As promised hereby some more pictures of the restoration of our 912.
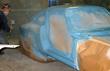
In the first pictures you can see the car ready to be sprayed with the
white epoxy primer. I do not have the pictures of the epoxy primer but
on the other pictures you can see the car painted in a light blue
'filler'. (I don't know what is the right word for it in English,
perhaps bondo). The reason for the filler to be blue is that, when in
case of chips of the paint by rock damage, you will not see a white
dot but only a lighter blue one.
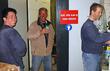
The last picture is of the three guys that help me restoring the car
into its original state. Left to right; Ray (metal works), Hein (my
uncle) and Rob (paint job).
You will hear from me soon.
Kind regards,
Perry Rijnbeek
|
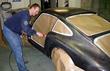
Rob.
|
|
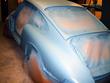
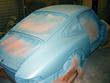
Masked, ready for painting.
|
|
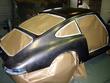
Filler layer on body
|
|
Rob spraying filler over the white epoxy primer
|
| |
|
Filler coat on other panels
|
|
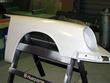
Hood
|
|
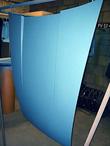
Fender
|
|
Ray (metal works), Hein (my uncle) and Rob (paint job).
|
Update April 6, 2003
Dave,

This weekend we have completed the inside paint job of the car. The
pictures attached show the inside of the car with epoxy primer, with
body coating and with the original paint (color code 6603 golf blau).

This week we start sanding the outside of the car. More pictures will
follow.

Kind regards,

Perry Rijnbeek
|
Epoxy primer
|

| |
|
Body filler
|
| |
|
Color coat
|
| |
| |
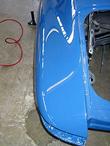
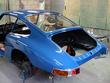
Update May 21,2003
Hi Dave,

So for all the fans hereby some new pictures of the 912.

The car is now completely sprayed in its original color. We sprayed
the car and the parts separate but all on the same day and with the
same paint so the color will be the same and also the structure. There
is also a picture of the rear fender of the car with a mat
finish. What we did is that, after the paint had hardened, we sanded
the car and parts with 2000 waterproof sanding paper, this picture is
after sanding. After that we polished the paint to extreme gloss with
a 3M 3 step polishing system, see also the other pictures.

The last pictures are of the car back in the garage with parts of it
already in place.

This must be it for now, when I have more pictures you will be the
first to see them.

Aircooled greetings from Perry.
| |
| |
| |
| |
| |
| |
| |
| |
|
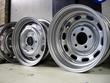
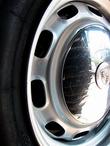
Wheels now refinished:
Dave,

News flash:

I just received my wheels back from powder coating.

I sand blasted the wheels myself. I took the wheels to a powder
coating company. First they coated a primer, then the silver color and
after that they powder coated a clear lacquer.

Aircooled greetings from Perry
|
Update July 25, 2003
Hi Dave,

Good to see that your site is online again.

Hereby some more pictures of the 912 restoration.

Can't hardly wait driving her again.

Perry
|
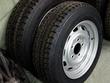
Last time I sent you the pictures of the wheels
back from powder coating. Well I now fitted brand new Vredenstein
Classic tires in size 185/70HR15. This a very classic looking tire but
it has the handling and inner toughness of the newest tires.
|
|
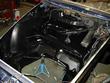
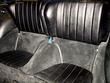
We have almost completed the interior of the car,
this was a tough job.
|
|
We made all new black velour carpeting and also a
new black headliner.
|
|
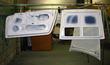
We have stripped the dash overlay and refinished
it with a nice black sky (this was probably the hardest job in the
interior, because of all the different round shapes.
|
|
The steering wheel we took apart, padded out the
Porsche emblem and sprayed it partially.
|
|
The master brake cylinder as well as the brakes
themselves have gone through complete restoration and are now fitted
again.
|
|
Yesterday the hood lid was put into place and
today I have finished the plate underneath the grill of the engine
lid. All of the aluminum fasteners were threaded out or broke of so
we made all new plates out of RVS or stainless steel, as you call
it. This took us about a day to make all the different pieces out of
nothing.
|
|
When we have the front and rear bumper back from
the body shop we can finish the car and only have to put in the engine.
|
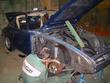
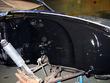
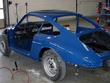
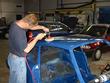
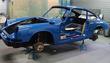
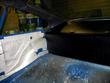
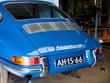
Update September 22, 2003
Hi Dave,
Hereby some more pictures of the '12. It is starting to look like a
complete car now. The engine and gear box are in and the bumpers are on
the car again. So I took another couple of pictures for the site.
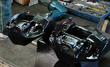
There are two pictures of the rear of the car with the license plate
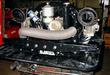
on it. Also some pictures of the engine before and after building
it in the car. I also added a few pictures that show how the full
flow conversion kit is build into the original housing of the oil
pump. And also one of the remote filter plate and filter. Finally some
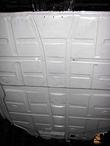
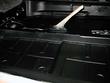
picture of the underside of the car.
I am trying hard to have the car finished by next week.
I'll keep you posted.
Auf wiedersehen,
Perry
|
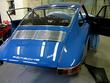
Rear showing license plate.
|
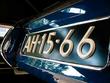
|
Another view of the license plate.
|

|
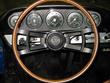
There is a picture of the interior with two
instruments added. The first is a clock and chronometer fully
mechanical (from a Russian jet fighter) and the other is a Halda
tripmaster, a very accurate distance measuring device. Both are used
for classic rallying.
|
|
Rear view of the engine before mounting.
|
|
Front view of engine before mounting in the car.
|
|
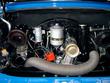
Engine Mounted in the car.
|

|
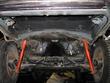
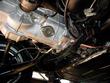
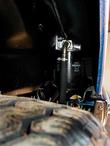
Underside of the mounted engine.
|
|
Transmission view, mounted in the car.
|
|
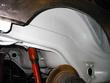
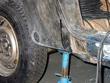
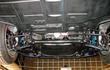
Front suspension from under the car.
|
|
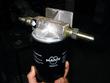
Oil filter
|
|
Oil filter mounting.
|

|
Engine third piece showing full flow oil fittings.
|

|
Full flow oil connections to the engine.
|
|
Painted Wheel
|
Last modified: Mon, 22 Sep 2003
Links
|


