Adjusting Injection Quantity
Special Tools:
P 25a Calibrated Vial
Adjustments
- Adjusting idle speed.
- Run engine to fill float chamber with fuel.
- Stop engine, remove both air cleaners.
- Work throttle arm until air bubbles cease to show at the pump
injection nozzle.
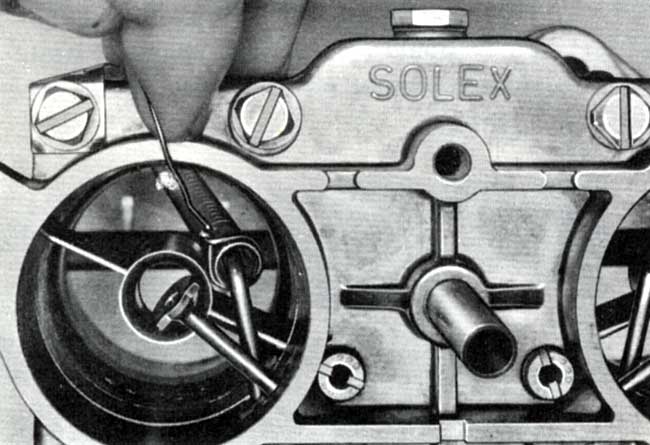
- Hold calibrated vial (P 25a) at the tip of the nozzle and quickly
move throttle arm two times from stop to stop.
- Check injection quantity, empty the calibrated vial, repeat
procedure on the second, injection nozzle.
- Injection quantity from each nozzle on two pump strokes should be
0.45 cc (7.3 minimum) during the warm season, and O. 65 cc (10.6
minimum) during the cold season.
- Check injection quantity in second throat.
- If required, readjust injection quantity by resetting the adjusting
nut on the pump rod. If adjustment should not be possible due to lack
of threads, insert a spacer between the pump arm and the nut.
Note
Fuel squirting from the pump nozzle should not strike the pre-atomizer
nor the venturi and must pass through the slit between carburetor wall
and throttle valve,
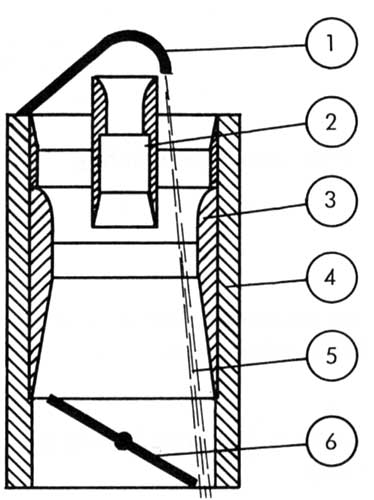
- Injection nozzle
- Pre-atomizer
- Venturi
- Carburetor body
- Squirting fuel
- Throttle valve
Should it become necessary to bend the injection nozzle, insure that
its tip remains at same height. The pump jet does not affect the
injection quantity. Changes in size of the pump jet affect only the
duration of injection since the jet size controls the flow only in
respect to flow duration. Injection quantity as well as the moment of
injection must be identical in all carburetor throats.
|


