|
Engine Rebuild
The education process on my engine rebuild started when I realized I
did not know what I wanted or who I wanted to do the work. This was
going to take a while and since I my goal for the car is to drive it
as much as possible, the first step began when I bought a spare
engine I could use while figuring out some answers.
The choices finally came down to 3 people and ultimately to
Hi Tec Automotive in San Rafael, north of San
Francisco. These guys are a full service independent Audi and Porsche
shop for 18 years starting with late model cars just out of warranty
back through 356 including a number of
four cylinder race cars.
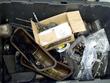
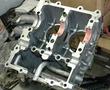
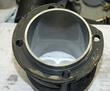
| 3/13/2004. Here is all that could be seen of my old engine. The case,
crank and heads are at the machine shop. The news on all these pieces
is ok so far. The crank will be ground 10 under and nitrided. The case
will have to be align bored because the openings are now oval. The
heads will be fly-cut to handle larger diameter pistons as the engine
will be converted to 1720 cc using Shasta pistons. The case had been
welded once to fix a crack at the mounting point for the oil cooler,
not an uncommon occurrence. I dropped off the carburetors from the
spare engine and the original 022 distributor as candidates for
rebuilding.
|

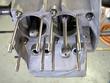
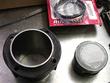
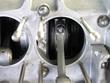
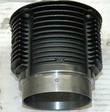
| 4/15/2004. Here is the head after returned from the machine shop. The
cylinder top slides into the circular area and seals against the flat
surface at the edge. We are changing to a 'big bore' kit where the
diameter of the cylinder bore increases from 82 to 86 mm. This means
that the wall thickness is smaller and the sealing edge does not have
to be as large. The combustion chamber is contoured to match.
Removing material in the combustion chamber also will increase the
size of the combustion chamber slightly. The target compression is
9.0 to 1 instead of the 9.25 to 1. This will sacrifice some
performance but increase engine life.
|
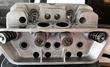
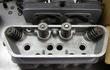
| 4/15/2004. The machine shop fitted the heads with new valves, guides,
springs, seals and keepers. There are new helicoils in the spark plug
holes.
|
| 7/26/2005.
|
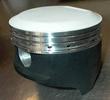
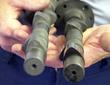
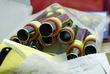
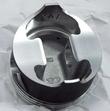
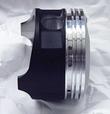
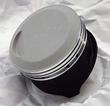
| 9/22/2004. These are forged Shasta pistons from Duane Spencer. The
tops were ceramic (zirconium) coated and the sides are Moly
coated. The top coating is designed to reflect the heat and force it
out the exhaust. The Moly coat is a friction reducing modification.
|
| 10/6/2004.
|
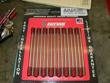
| 10/6/2004. Head studs from Raceware.
|
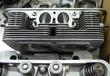
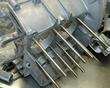
| 9/28/2004. Raceware head studs installed in the case.
|
| 9/28/2004
|
| 9/28/2004
|
| 9/28/2004
|
| 9/28/2004
|
| 9/28/2004
|
| 9/28/2004
|
| 9/28/2004
|
| 9/28/2004
|
| |

| |
| |
| |
| |
| |
| |
| |
| |
| |
| |
| |
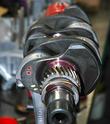
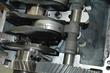
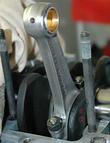
| When a crankshaft is ground, typically in 0.010 in. increments, or the
case is align bored, again in 0.010 in. increments. Each time this is
done, a different set of bearings is required from the standard
size. 'Std-std' bearings are readily available. 20 over - 10 under
bearings like mine are not easily found. The first attempt to find
bearings was futile. Eventually a made-up set was found using a partial
set from a 356C and the last special ordered from Germany.
When these were inspected prior to installation, they were found to be
scratched as shown above. Immediately a call was made to find some
more and they were found at a standard source. In the space of a few
months, they changed from 'NLA' to 'in-stock'.
The adage is true. Measure the parts, find the bearings, then do the
machine work. The cost of rare new bearings can change the decisions
made on what parts should be purchased and what machine work should be
ordered. Alternate cases or crankshafts may be easier to find than new
bearings.
|
| |

| |
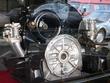
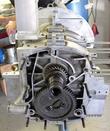
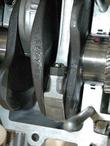
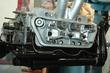
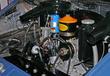
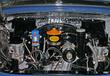
| 12/4/2004. My brother Pete and his wife Lydia visited us from New York,
flying through the San Francisco airport. We took them back to the
airport through San Rafael to see the engine. Here it is, waiting for
the exhaust system and some plated parts to get back from the coating
vendors.
|
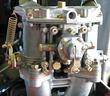
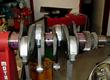
| 12/4/2004. The carburetors were rebuilt by Harry Bieker. Aren't they
beautiful? Cleaned, machined, new shafts, bearings and butterflies.
Parts all plated. They look better than new!
|
| 12/4/2004. There were some issues with them and I would recommend they
be checked carefully before use. We had problems with one float, a
mismatched jet and some leaks.
|
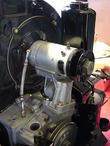
| 12/4/2004. Here you can see the CSP pulley - very nice. And the
powder coated generator pulley. After driving a hundred miles in the
rain, I had some generator problems and then some issues with the fan belt.
|
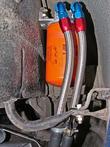
| 12/27/2004. CSP also supplied the full flow oil filter. It uses a
Fram HP1 high performance racing filter, good for 10 GPM with a
maximum operating pressure of 200 PSI, 500 PSI burst and a 25 micron
rating with a pressure relief valve and an anti-drainback valve.
|
| 12/27/2004
|
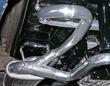
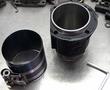
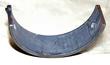
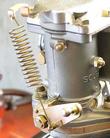
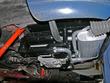
| 12/27/2004. This is a standard Bursch street exhaust system - an
inexpensive one that does not include the capability to unbolt the
muffler as others can do.
We made some modifications to it. First tabs were welded on that are
used as standoffs to attach to the sheetmetal above. This is the same
idea as the stock exhaust.
An Oxygen sensor fitting is welded to the pipe. This fitting has not
been used yet.
The system was then ceramic coated. The hope is this coating will
extend the life of the system and will force more of the heat out the
exhaust pipe and radiated less into the engine compartment.
|
| 12/27/2004
|
| 12/27/2004
|
Last modified: Sat, 25 Dec 2004
Links
|


