|
Carburetor Rebuild
Under Construction
The carburetors on my spare engine were running poorly, so I decided
to put a kit in the old ones and to use them instead.
|
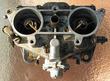
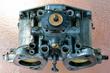
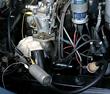
Top view
|
|
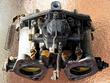
Accelerator pump side
|
|
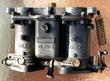
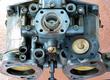
Float bowl side
|
|
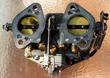
Bottom view
|

|
Underside of the top plate
|

|
Float parts
|
|
After removing accelerator pump cover
|
|
After removing accelerator pump membrane. Shows
the spring that pushes the membrane back out after a stroke.
|
|
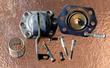
Accelerator pump cover, membrane, spring and screws.
|
|
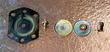
Accelerator pump membrane taken apart
|
|
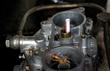
Test setup using an electric fuel pump to fill the
float bowls without running the engine. Can check for major leaks at
the same time.
|
|
Using a straw to watch the float go up and down as
the float level is changed. The screw just below the banjo fitting on
the left adjusts the float level. If the screw is screwed too far in,
it can bend the adjustment mechanism.
On the right side of the picture, just below the SOLEX in the top
plate, a bolt has been removed. This bolt has a rectangular cut out
that shows where the gas level should be set. If the float is too
high, gas will come out this hole. Too low and it will not. If the
adjustment screw is all the way out, the float is high and gas will
come out the hole.
There is a (dirty) rag under the carb to catch the gas that spills out
of the float chamber.
To adjust, the fuel pump should be on. Turn the screw in until the gas
level reaches the bottom of the cutout.
|
Last modified: Thu, 24 Jul 2003
Links
|


