Disassembling and Reassembling Rocker Arm Carrier
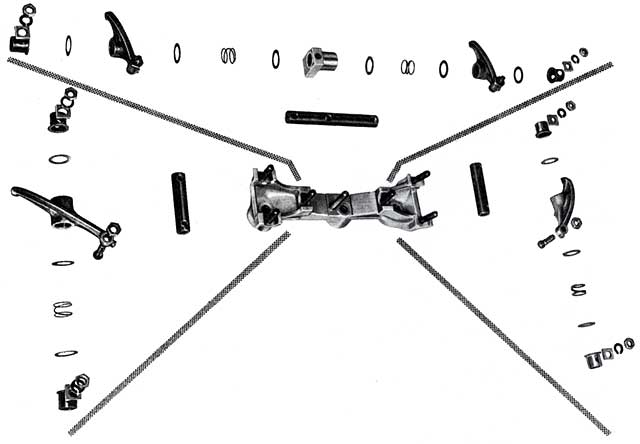
Disassembly
- 1. Remove the 7 hex nuts (SW 13) from the rocker arm shafts.
- 2. Withdraw rocker arm shafts with rocker arms, springs, washers,
and spacers.
- 3. Remove valve adjusting screws.
Reassembly
Reassemble the rocker arm carrier in reversed order of the above by
noting the following points:
- 1. Inspect rocker arm shafts and rocker arms for defects. Replace
parts showing traces of wear or damage.
- 2. Inspect valve adjusting screws for defects. Replace screws which
have strained threads or damaged ball joint sockets.
- 3. Check adjusting screws and rocker arms for unobstructed oil flow.
- 4. Arrange the spacers and / or thrust washers in such way that the
rocker arms strike the valve shafts approximately in the center of the
shaft butt, and that the pushrods do not come in contact with the
pushrod tubes.
- 5. Make certain that the washers, springs, and spacers are properly arranged.
|


